Electric Bikes – Wheel Building part 2
In the previous post I mentioned the delay in getting the spokes I needed, well they finally arrived last week. Lacing the wheel was reasonably easy, and stress free, other than the slightly disturbing way the wheel goes together, so loose and floppy that you think the spokes are too long again, when suddenly and miraculously the wheel tightens up, with just a couple of threads of the nipples still to go. All nipples were adjusted so that the threads on the spokes just disappeared into the nipple, this is best determined with a thumbnail rather than my poor eyesight!
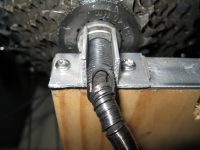
Next job is to true the wheel – for which most people would either use their local bike mechanic, or at very least buy a wheel truing stand. But this was my first wheel build, and I really wanted to try it myself without a large investment in extra equipment. So over the course of the next few evenings I designed and built a stand exactly tailored to my 700c rim on my 135mm wide rear hub. It was carefully crafted out of a plank 140mm wide, some 50mm square framing, and some right angle profile aluminium extrusion.Remarkably, once built and the wheel installed in it, this device was accurate and stable, with the wheel exactly centred between the uprights. Using an adjustable set square as the “finger” I was able to determine exactly how out of true it was, dish, roundness and sideways. Below are some photos showing the home built stand, and some detail of how the axle is held accurately in it.


Once the wheel is held securely, the whole truing process becomes quite simple and straight forward. Using the set square set to approximately where the rim will be when trued, dishing the wheel just involves going around the non drive side of the wheel, tightening the spokes 1/4 turn at a time, pulling the wheel over. This tightens the drive side spokes too, and at one point I loosened the drive side a 1/4 turn to ease the tension a bit. As the dishing gets close, it is time to start making the wheel run true, by adjusting the spokes just where it is furthest away from the finger as it rotates. At some point, the finger can be adjusted by turning the wheel around in the stand, and checking the wheel for being centred, and the dishing can be tweaked again to the new measurement. Part way through, the spokes are “stressed” as seen on Bruce’s video, and tweaking continues. The wheel was little out for roundness, so the spokes were tightened on both sides at the point where it had the biggest radius, pulling the wheel into perfect roundness. Eventually, the wheel came right, was shod with a tyre, and replaced in the bike.
This morning was my first real ride on it after the wheel build, and my first for over a month while waiting for the parts to arrive. It felt great, smooth, strong and gave me a lot of confidence, which had been missing for several months of riding the old wheel. Even riding in the rain felt good.
The appearance of the bike has changed too, it now has matching front and rear rims as I have laced the original rim to the motor. More subtly, both wheels are laced with a single cross lacing rather than the rather strained looking two cross lacing the rear wheel had previously.

Only time will tell, but I am hoping this wheel will be stronger and longer lasting than the cheap wheel supplied from China with the motor.
Personally, I can now add building electric bike wheels to my accomplishments and skills, and look forward to building more wheels in the future.
Our bikes forks have lugs for disc brakes, so the next job may be to lace our front rims onto disk capable hubs, and install disks on the front of our bikes!
Leave a Reply