Lazy Susan – 3d print
So while I was working on the Haid and Neu, trying to get the needle timing right, I was having to view the needle and shuttle interaction from the front of the machine, from the rear of the machine and from underneath. Underneath is no issue if the front is facing me, as it hinges back quite easily. However turning the machine to view it from the front, back and the side was staring to become a bit much, even a tiny machine such as this is a fair chunk of cast iron. Added to that I have screwed rubber feet to the bottom to protect whatever table I will display this one on. Working with slightly oily hands is not good when handling the varnished base.
So I decided to find a turntable to rotate it on. We used to have a “Lazy Susan” for the centre of our dining table, but it was sold or donated as we never used it. I needed something very robust to take any of my machines, my 201k and my 15k are both very heavy machines.
I did a search on the web,and most seemed a bit small. I can go up to 200mm diameter on my printer, which happens to be the width of most sewing machines, so I would like something about that size. I did find some parametric designs which can be made in any size, using any size and number of ball bearings. I selected one that looked simpler and more robust than the others, and downloaded it from printables.com
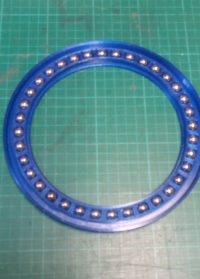
The parameters are fairly obvious, I played with them a bit and decided on 200mm diameter, and 36 bearings 3/8″ in diameter which I had salvaged from gearbox and wheel bearings off my old mini. Unfortunately my collection of bearings was not all 3/8″, most were metric 10mm. Not a huge difference, but there were only 23 of the smaller size. I therefore had to reprint the bearing ring to take 36 10mm bearings.
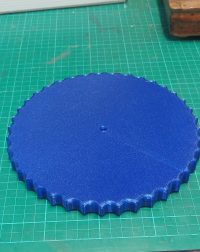
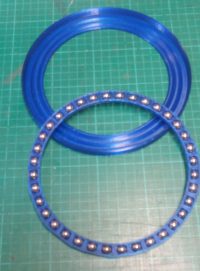
I used a transparent blue PETG filament, and printed the 3 parts. The bearing ring (like a cage to keep the bearings together) took about 2 hours to print, which I ended up doing twice. The bottom part, which is where the track for the bearings to run is located, took about 4 hours to print. The base is quite thick and strong, and 36 bearings will spread the weight over it quite well. Finally the top, which I modified slightly to include a boss and a central hole for future use, took about 9.5 hours. This has the top track for the bearings, and a knurled outer wall . It is very strong and solid feeling, and again with the load spread over 36 bearings it easily takes 10 kilos or more and spins freely.
The pictures show the bottom and the bearing ring, and the fully assembled item.
A good days printing of a tool which will be very useful.